Thursday, October 25, 2012
Building The Gertboard
The next few posts are going to be in french. They will have a lot of pictures however, so you can still follow. The reason I'm posting in french is that there are no resources available at this time regarding the Gertboard, in french.
First will be the SMD components, then the rest, in the same order as the english instructions.
I did substitute a few components, basically, different color headers, different color (and size) LEDs etc, but it is fundamentally the same thing. It does illustrate the value of having the Gertboard as a kit though. I doubt I would have even bought one if it had not been available as a kit. Half the fun is building it and tweaking it for your use.
Now that I've actually used it, I will build another one, with several more mods and a different DAC. I'll wait until they are back in stock to look into that however.

Wednesday, October 24, 2012
Pocket Mini Computer Build
Build
Putting together the Pocket Mini Computer kit: |
| Capacitors |
 |
| Resistors |

 |
| Did anybody say resistors? |
 | ||
| A lot of them. And a PS/2 connector |
 |
| PS/2 Keyboard and 3.5mm audio |
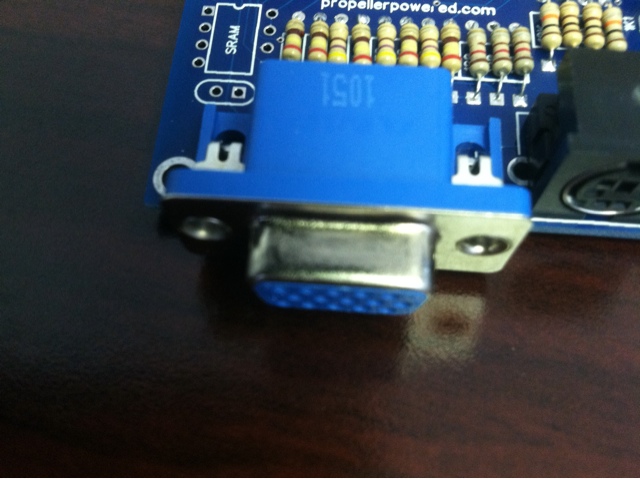 |
| VGA connector. Solid |
 |
| Bottom, included. Above, my replacement |
 |
| It gives me a header on top |

 |
| Not just on the bottom |
 |
| Propeller board with spacers |
 |
| It works! |
 |
| Added reinforcement for keyboard |
 |
| Orange cable: probe |

Pocket Mini Computer kit
On my previous post, Blue Screen Of Basic, I was showing the output of a computer mini kit I just built.
It is not a competitor to the Pi, particularly based on spec and price. It wont run Linux. At any rate, you are probably anxiously waiting on your backordered Raspberry Pi and Gertboard, so that'll give you something to do, hehehe.
Rather, it's something to learn soldering on (or in my case, have fun building stuff, like people do puzzles or crosswords), and play with Propeller Basic and SIDCOG, an emulation of the SID chip including filters using one of the 8 "cogs" (core) of the "processor".
I should really say microcontroller. It runs on a Parallax Propeller microcontroller QuickStart board which is included in the $39 price tag (and that is less than what Radio-Shack sells the P8X32A by itself!)


The parts


 Now, let's build this.
What
The Pocket Mini Computer is a simple kit that can be put together in an evening. Just like the Raspberry Pi, it is a bare board (quite like the Apple I). You then need a keyboard (PS/2), monitor (VGA) and power supply (5V, mini USB).It is not a competitor to the Pi, particularly based on spec and price. It wont run Linux. At any rate, you are probably anxiously waiting on your backordered Raspberry Pi and Gertboard, so that'll give you something to do, hehehe.
Rather, it's something to learn soldering on (or in my case, have fun building stuff, like people do puzzles or crosswords), and play with Propeller Basic and SIDCOG, an emulation of the SID chip including filters using one of the 8 "cogs" (core) of the "processor".
I should really say microcontroller. It runs on a Parallax Propeller microcontroller QuickStart board which is included in the $39 price tag (and that is less than what Radio-Shack sells the P8X32A by itself!)
The box

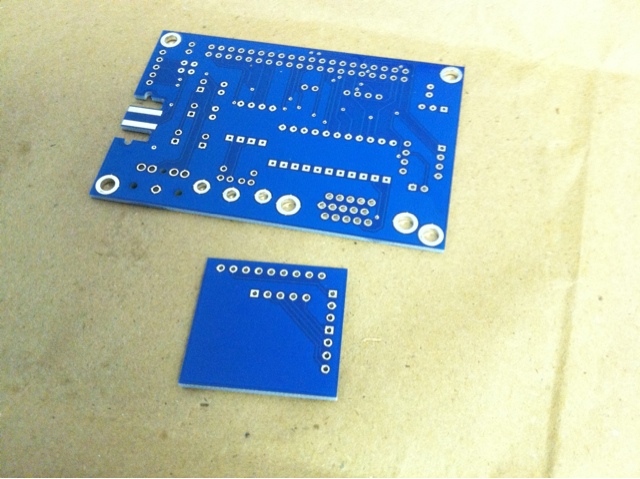
The bags


Bonus
While supplies last, Jeff includes a laser cut acrylic reference block for the P8X32A GPIOs.
Blue Screen Of Basic
Last hardware I featured was for the Apple fans. This one is for the Commodore fans.
Tonight on Masterpiece Mystery:


See my next post on the subject.
Tuesday, October 23, 2012
512MB de memoire vive
256MB
Le mécanisme de sélection de la mémoire disponible a Raspbian sur le Raspberry Pi sur les versions du modèle B avec 256MB de mémoire, c'est par raspi-config.En effet, on tape
Et on se retrouve avec un choix qui nous permet de définir la mémoire pour Linux et la mémoire pour Videocore.$ sudo raspi-config
Yorlin974 a traduit cet utilitaire et il a un tutoriel.
512MB
Depuis peu, les modèles B offrent maintenant 512MB de mémoire vive. Mais comment gérer cette mémoire?
Premiere des choses, il faut se procurer rpi-update. Ce n'est pas inclus avec la distribution Raspbian officielle. On se le procure ici:
https://github.com/Hexxeh/rpi-update
Ou encore plus direct, on tape ces commandes:
$ sudo apt-get install ca-certificates$ sudo wget http://goo.gl/1BOfJ -O /usr/bin/rpi-update && sudo chmod +x /usr/bin/rpi-update
On l’exécute ainsi:
$ sudo rpi-update
Pour controler combien de memoire est disponible au systeme d'exploitation, on indique dans un fichier /boot/config.txt le parametre gpu_mem. Il faut donc editer le fichier avec vi ou nano ou autre editeur favori:
$ sudo su# vi /boot/config.txt
et on ajoute la ligne:
gpu_mem=64
Dans ce cas ci, la memoire allouee au Videocore sera de 64MB, et donc pour Raspbian ca sera:
Mémoire totale - memoire pour videocore = memoire pour raspbian
512MB - 64MB = 448MB
On peut mettre ce que l'on veut, en increments de 1MB, donc 56MB serait valide, et 129MB egalement. On ajuste selon le besoin. Il faut toutefois faire un reboot pour que ca prenne.
Sunday, October 21, 2012
Some links for pycarolinas attendees
Some links for those who attended the talk today at PyCarolinas 2012, Raspberry Pi: From Kindergartners to Mad Scientists.
To get you started:
The official Raspberry Pi website: Raspberrypi.org
The official Raspberry Pi website forum: Raspberrypi.org forum
The Mag Pi magazine: themagpi.com
Pi In The Sky: Pie1
To get you started:
The official Raspberry Pi website: Raspberrypi.org
The official Raspberry Pi website forum: Raspberrypi.org forum
The Mag Pi magazine: themagpi.com
Pi In The Sky: Pie1
Saturday, October 20, 2012
The solution
It is a CES Industries Ed-Lab Microcomputer Lab model # 804.
That was a mouthful. It was made in 1982 (that's 30 years old!, for those math impaired), and was based on a Franklin Ace 1000 microcomputer, itself a clone of the Apple ][ Plus, but with an interesting enhancement: lower case support for the display and a caps lock / shift key that worked. It also had a full keypad.
If you strip away the special expansion card and the fancy case, it was pretty close to the Apple ][ some of you might have played with in the early 80s. I remember doing conversions to HEX code from 6502 assembler by hand, and typing that straight into the monitor (that was the call -151 reference on hint #2). And one thing that was extremely cool with computers from that era: instant on. Power on, hit break / reset and start coding right away. Of course, back then Python wasn't even thought of, so at the prompt, it was the Basic programming language that was king. And we had no choice but to understand the hardware and the software to really use these to the full. Thank you, Woz.

Bob Rosenbloom sent the following: "ED LAB microcomputer training systems with a Franklin motherboard and video card."
I asked how he figured it out and he said:
"I've had them in the past. The banana jacks gave it away. I still have many of their analog and digital trainers, including one based on the Intel 8085."
However, the first (and only) to identify correctly the correct motherboard (Franklin Ace), even before seing the innards was ukscone on the Raspberrypi.org forum. And the first to correctly identify the specific Ace model was LC, who left a comment on hint #4.
It was quite interesting to see the various guesses and the interest this topic stirred. This post wraps it all up.
If you want to review all the hints:
Hint#1
Hint#2
Hint#3
Hint#4
Hint#5
In a future post, I'll talk about what I had to do to make it operational again, and what I still have to do, such as fixing the video modulator board / 80 column card (to remove the vertical lines) and fix the case itself. Another interesting story that needs to be told also is that of the Franklin computer itself. As for CES, I'm still researching that part.
That was a mouthful. It was made in 1982 (that's 30 years old!, for those math impaired), and was based on a Franklin Ace 1000 microcomputer, itself a clone of the Apple ][ Plus, but with an interesting enhancement: lower case support for the display and a caps lock / shift key that worked. It also had a full keypad.
If you strip away the special expansion card and the fancy case, it was pretty close to the Apple ][ some of you might have played with in the early 80s. I remember doing conversions to HEX code from 6502 assembler by hand, and typing that straight into the monitor (that was the call -151 reference on hint #2). And one thing that was extremely cool with computers from that era: instant on. Power on, hit break / reset and start coding right away. Of course, back then Python wasn't even thought of, so at the prompt, it was the Basic programming language that was king. And we had no choice but to understand the hardware and the software to really use these to the full. Thank you, Woz.

So who got it right?
Bob Rosenbloom sent the following: "ED LAB microcomputer training systems with a Franklin motherboard and video card."
I asked how he figured it out and he said:
"I've had them in the past. The banana jacks gave it away. I still have many of their analog and digital trainers, including one based on the Intel 8085."
However, the first (and only) to identify correctly the correct motherboard (Franklin Ace), even before seing the innards was ukscone on the Raspberrypi.org forum. And the first to correctly identify the specific Ace model was LC, who left a comment on hint #4.
It was quite interesting to see the various guesses and the interest this topic stirred. This post wraps it all up.
The recap
If you want to review all the hints:
Hint#1
Hint#2
Hint#3
Hint#4
Hint#5
In a future post, I'll talk about what I had to do to make it operational again, and what I still have to do, such as fixing the video modulator board / 80 column card (to remove the vertical lines) and fix the case itself. Another interesting story that needs to be told also is that of the Franklin computer itself. As for CES, I'm still researching that part.
Subscribe to:
Posts (Atom)